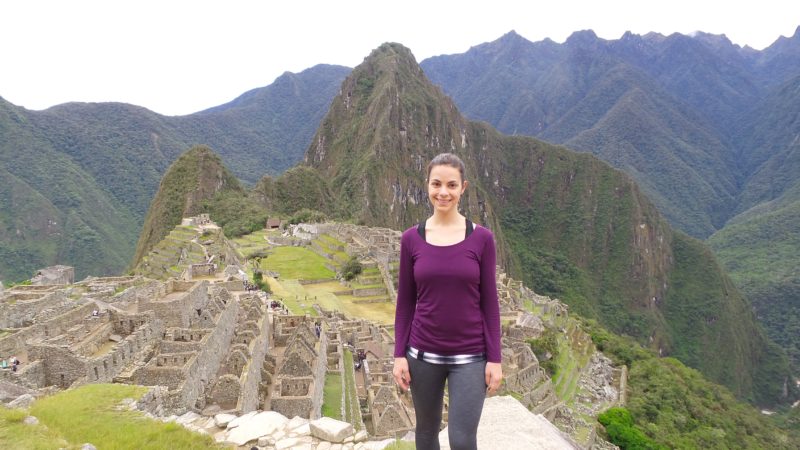
Hiking the Inca Trail to Machu Picchu was an experience everyone should do. Machu Picchu, itself, is one of the New Seven Wonders of the World. It is located in the Cusco Region of Peru, it sits above the Sacred Valley. Traveling there, you first must fly into Cusco Peru, which is a small, Inca village and an experience all its own.
You could take a bus or train from Cusco to the small town of Aguas Calientes, and then take a shuttle bus to Machu Picchu. Or you could opt to hike the ancient Inca Trail.
The Inca Trail itself is a spiritual journey that makes you appreciate the beauty and wonder of Machu Picchu that much more. Hiking the Inca Trail is a four-day, three-night excursion, where the journey is just as good as the destination.
Here I share some Inca Trail hiking tips so you can start planning your next journey.
Prepare Early for the Inca Trail
There are a few decisions you have to make when deciding to hike the Inca Trail. First, you MUST hike with a certified company. This is to preserve the trail. After doing some research, we decided to go with Peru Treks. We chose the four-day, three-night trip. Your trip includes all your food and a tent. If you don’t have sleeping bags or walking sticks, you can rent them. We each decided to carry our backpacks loaded with clothes and toiletries, but you could pay a local to carry these for you.
Get Ready for the Hike
You get picked up at 5 AM the day of your trip. It’s about a two-hour ride from Cusco to the start of the trail.
The trail ends at Machu Picchu, where you get to explore the ruins for the day. Then you will take a ten-minute shuttle to the small city of Aguas Calientes. That same night, you will get a train ticket to retune to Cusco.
Pro tip: I recommend staying a night in Aguas Calientes after your hike. You can opt to have your train ticket back to Cusco for the next night. This will give you an entire second day to walk around Machu Picchu and not feel so rushed and tired from your hike!
The first day was the hardest. You walk through small villages, see the local people, their homes, and plenty of lamas. The trail is pretty flat and wide. Once you reach camp, your tent is already set up for you. There is also a larger tent set up with tables and chairs where the group eats their meals. Each camp area also has communal bathrooms. I’ve done a lot of camping, and I would most certainly consider this glamping.
Highlights: Other Inca Sites

Along the trail there are various sites, including the following:
“Town Above the Clouds”: This is the town of Phuyupatamarca. Here you find yourself 3,650 meters above sea level, and you feel like you are in the clouds.
The smaller ruins like Llactapata, Runkurakay, and Sayacmarca were amazing. We walked to the top of each ruin, took a break, and enjoyed views of the Urubamba River. These were the jewels that no one saw unless they put in the effort of hiking the trail.
The Sun Gate: I wasn’t exactly sure what the Sun Gate was, or where and when I would reach it. I just kept walking and walking. We started to climb up a wall and one of the group leaders standing at the top grabbed my hand to help me up and said, “Welcome to the Sun Gate.” I looked up and there it was: Machu Picchu. Tears literally filled my eyes as I looked around, taking in the scenery and feeling the life spirit around me.
Pack Smart
Since your larger items and food are taken care of, you don’t have to worry about bringing too much other than clothes. Here are the top items I brought and needed on the way:
 1. Jade backpack
This kept all my items organized and secure. I loved the side and front zippers for easy access.
2. Waterproof boots
It rains A LOT on the trail. You will get wet. My Keen Gore Tex boots were a godsend and kept my feet dry.
3. Good poncho
Rain, rain go away!! I have more pictures of myself wearing my poncho than not. However, in this case, I was more than happy to go for function over style. Make sure your poncho covers your backpack, too!
4. Snacks: nuts and chocolate
Peru Treks kept me well fed. One day we even had a second breakfast. We also snacked on popcorn and the last day we had cake. I recommend bringing something to reward yourself when you take a break on the trail after you climb straight up, or straight down.
Pro tip: I love shopping on Thrive marketplace for great deals on both nuts and chocolate! If you buy ahead and portion out what you plan to take with you, you will save a bunch of money!
5. Camera
Obviously, you will take a lot of pictures as this is a truly memorable experience. I had a Samsung digital camera with Wi-Fi. The built-in Wi-Fi came in handy when we got back to the hotel and were able to easily share our photos with family back home.

